
Hi Readers, hope you enjoyed my previous blog on PAD. Today’s article is based is the conclusion of the previous blog. We will see the rest of the folder action in the power automate desktop (PAD). Today we will see folder actions.
1. Empty folder
2. Copy folder
3. Move folder
4. Rename folder
5. Get special folder
Let’s Begin!
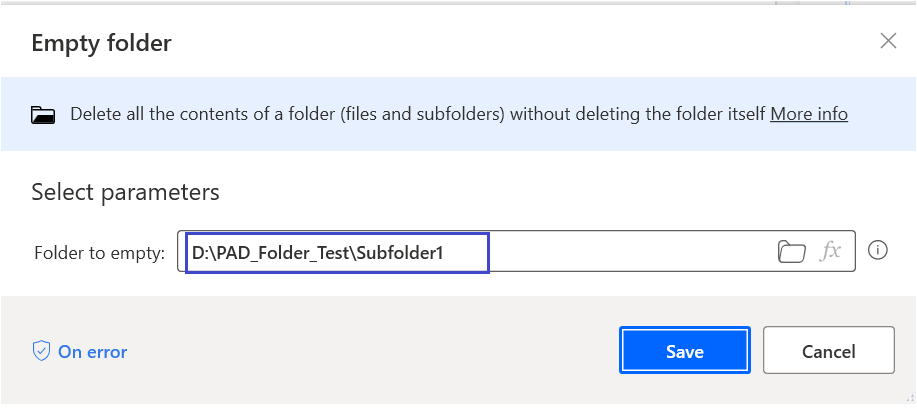
Empty Folder
Delete all the contents of a folder (files and subfolders) without deleting the folder itself.
Copy Folder
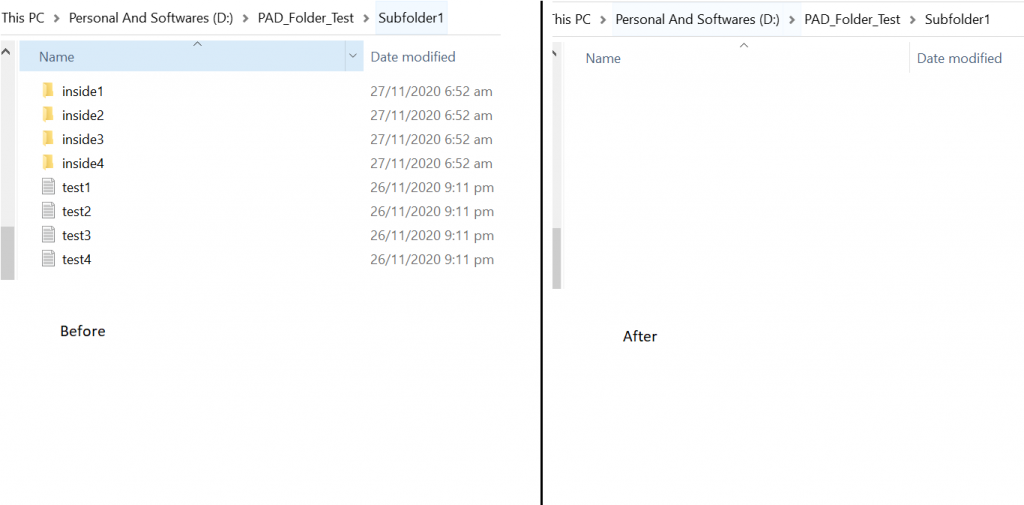
Copy a folder to a destination folder. While copying it includes all the files and subfolders as well. For demonstration purposes, I will copy D:\PAD_Folder_Test to D:\PAD_Folder_Test\Subfolder1.

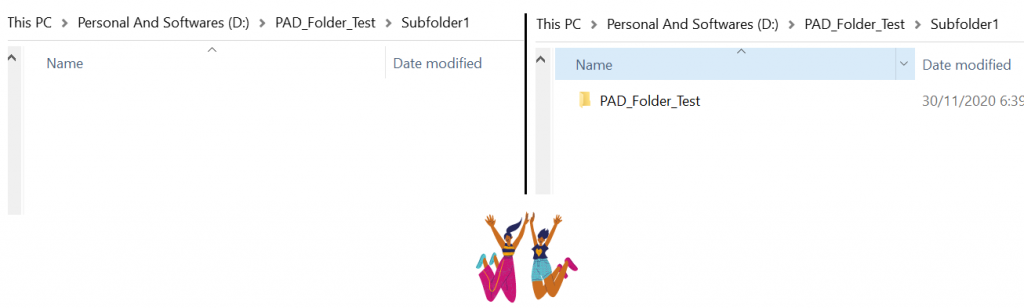
As you can see in the above screenshot, I am copying the PAD_Folder_Test into Subfolder1. All the folders and files inside it will be copied. You can use if folder exists option as per your requirement, either overwrite or do nothing. In above example, I am using the overwrite option for existing folder.
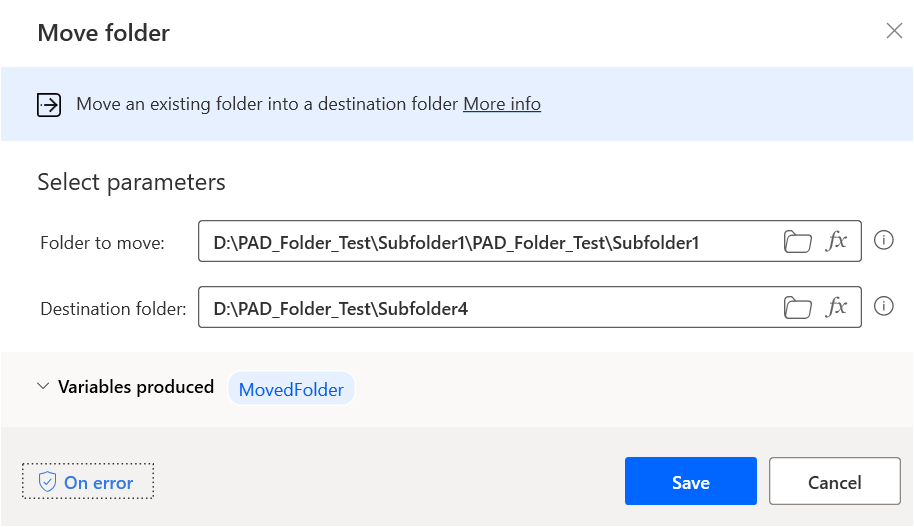
Move folder
Move an existing folder into a destination folder. Basically, this action does cut and paste the whole folder and items inside it. So the basic difference between the Copy and Move folder is the removal of the folder from the source in case of a move.
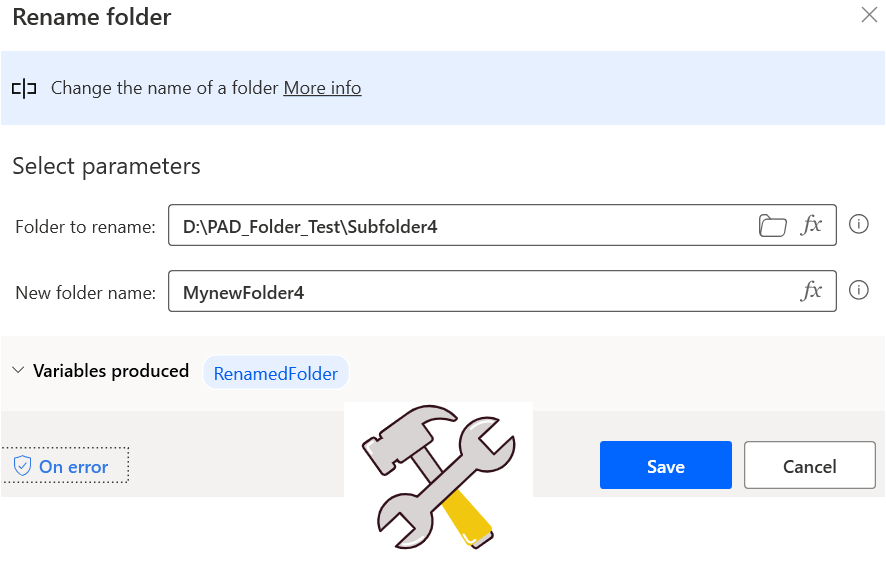
Rename folder
As the name says, it changes the name of a folder. When we want to rename any folder then we use this action. It is only applicable for folders and not for files.
Get Special folder
Last but not the least, this action retrieves the path of a windows’ special folder (such as Desktop, My Picture, Internet Cache, etc).
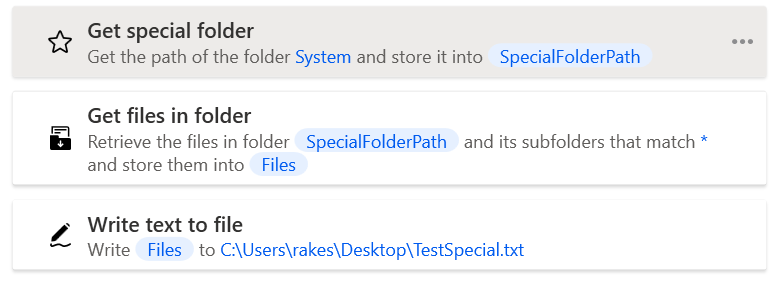
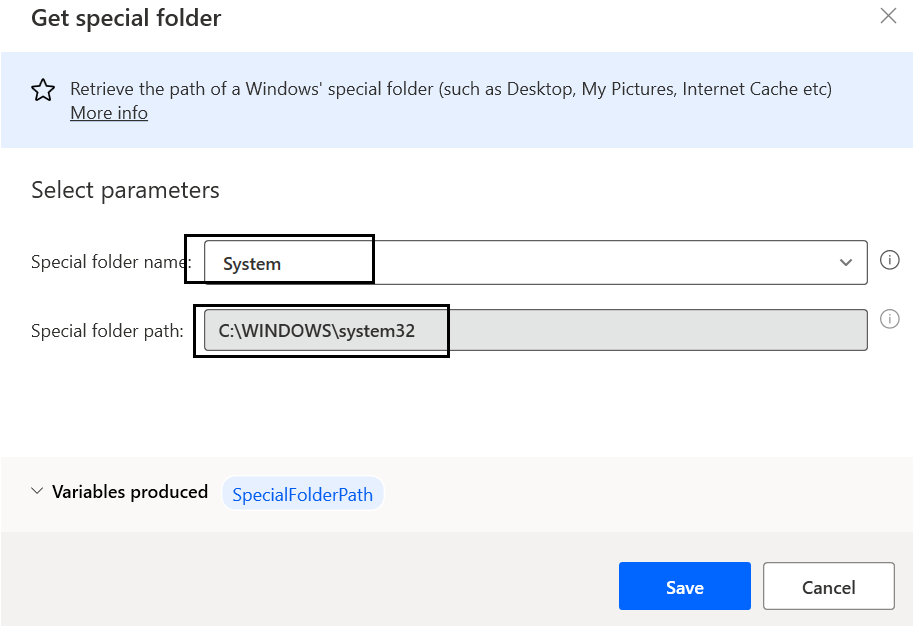
Step 1 : System folder path using get special folder action. We can use folder name dropdown to select the folders.
Step 2: Get all the files inside the System folder.
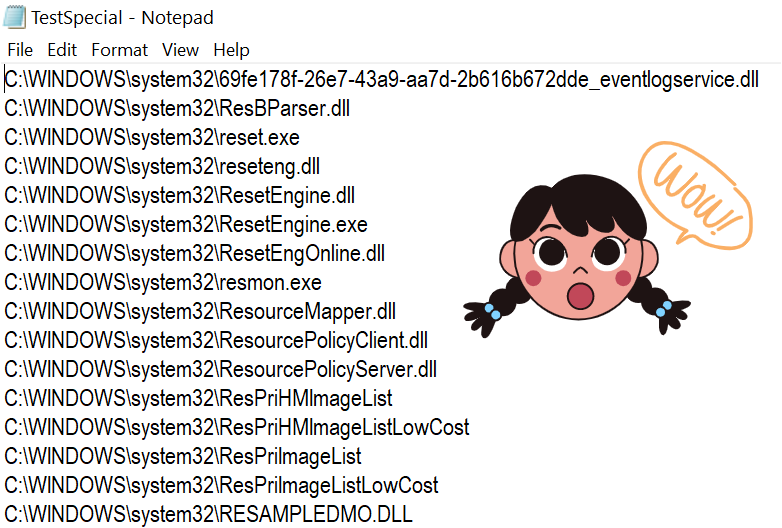
Write all the files’ list into TestSpecial.txt file.
Hope you all will like the final part of the Folder Action in the Power Automate Desktop series. Please share this article and suggest us upcoming topics in comment section.
