Hello Readers, today we will demystify the loops in power automate desktop. As we all know that understanding of loop is very important in the programming and development world. Most of the time we need to loop the steps while automating a task or step.
Let’s begin our demystifying journey of Loops in PAD. I will discuss this topic in part wise, this is the first part and will consist of the below topics.
1. Loop action
2. For each block
I have created a LoopExample flow to demonstrate the loops. If you don’t know how to proceed, please go through our previous blog.

Loop Action
We will start with Loop action in PAD.
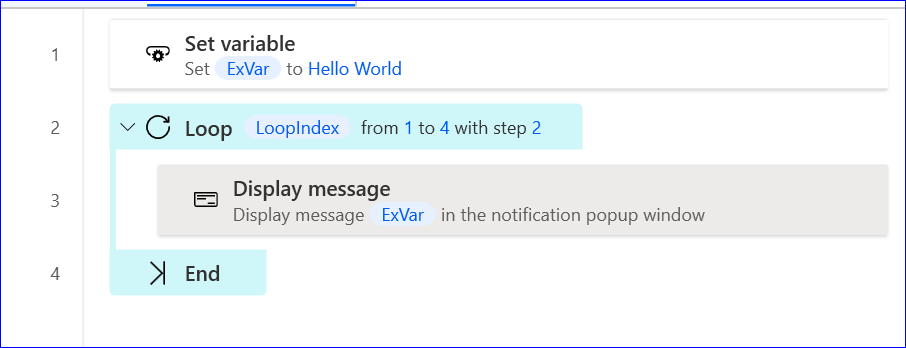
From the above screenshot, you can see I have created a three-step flow.
1. Set a variable.
2. Start Loop
3. End Loop
We will discuss each step in detail.
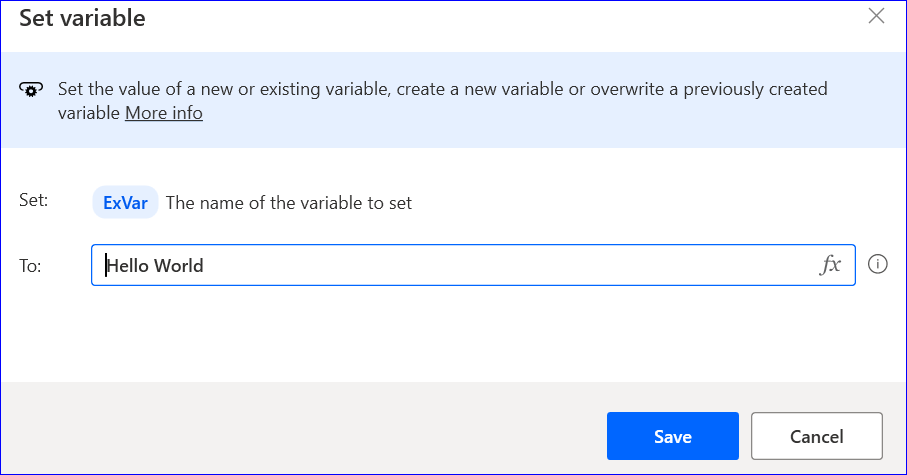
Set Variable
Start and End Loop
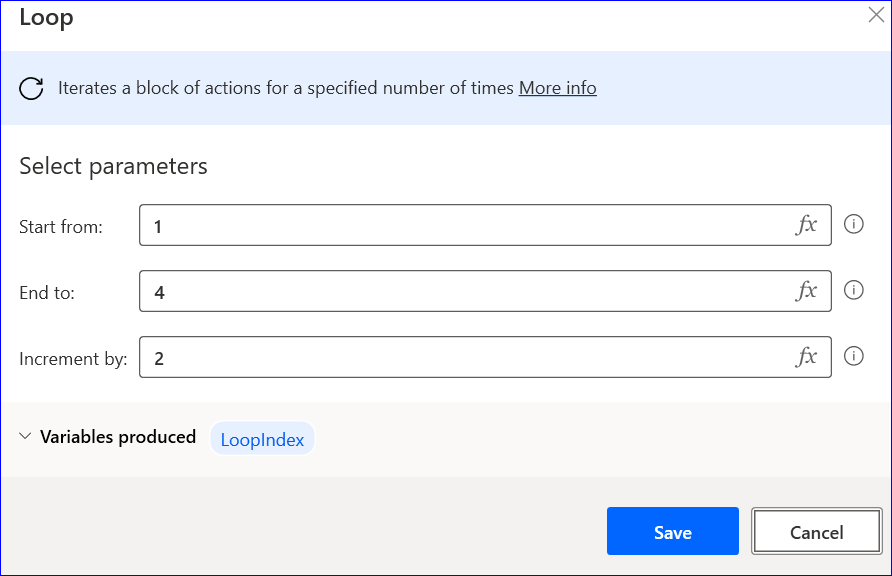
We will set the start and endpoint of the loop counter as well as the incremental value. Now we will place the display message action inside the Loop action.
Now, run the flow. You will see the display message twice. Why? Because our loop is starting from 1 and ending at 4 with an increment of 2. Therefore it is showing the display message two times.
For each loop
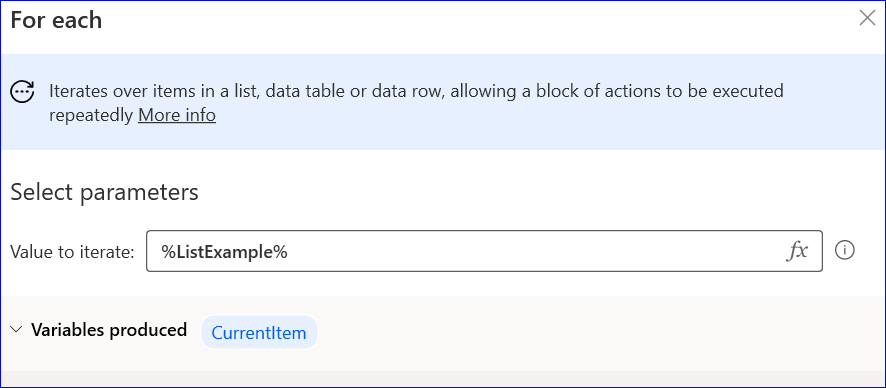
This loop can be used to iterate the items in a list, data table or data row.
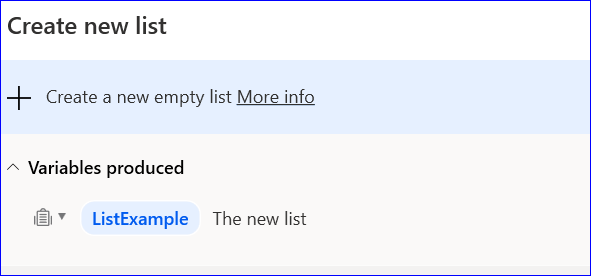
Create and Add items
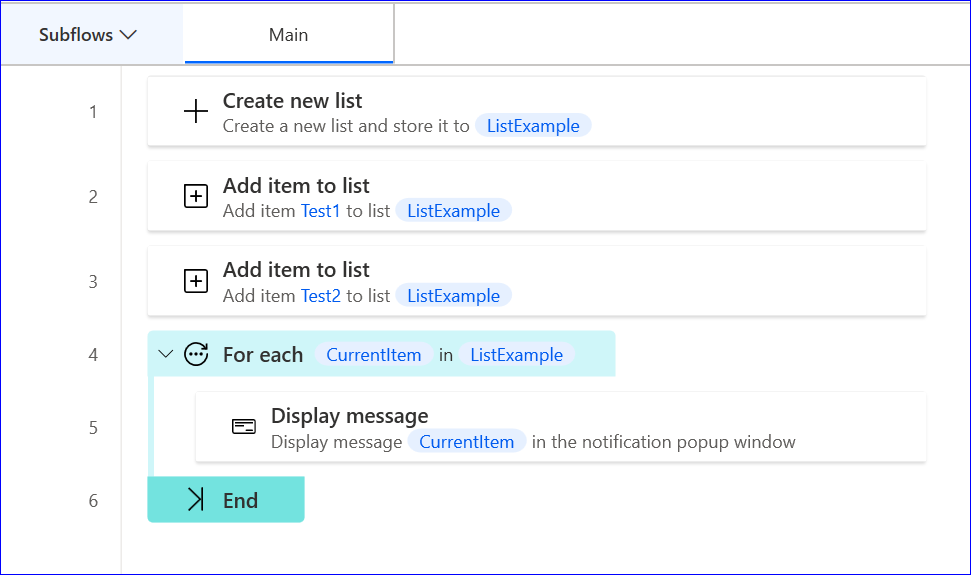
In this step, we will create and add items into the list. We are creating items to display them using for each loop.
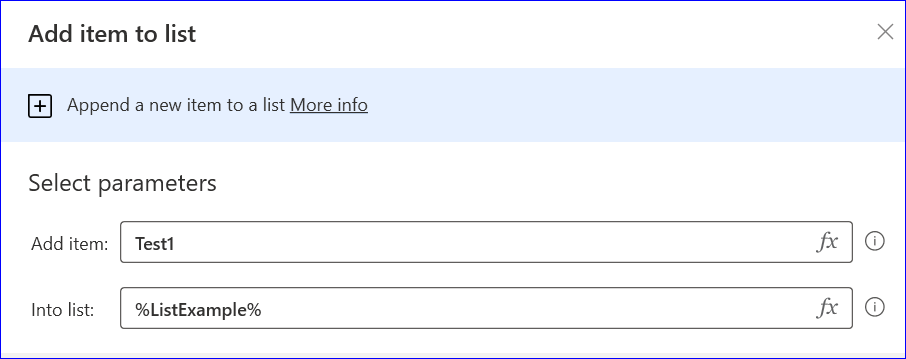
We will add items Test1 and Test2 in newly created list. Now iterate the list value using for each loop as shown in below picture.
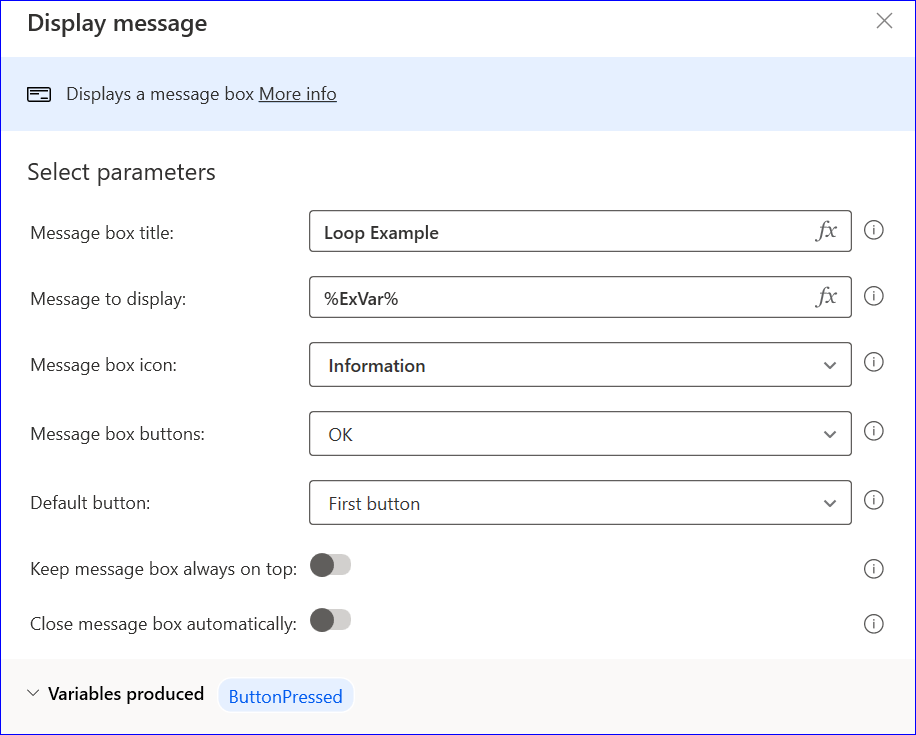
After completing the above steps, place the display message action inside the for each block. Refer below picture for settings.
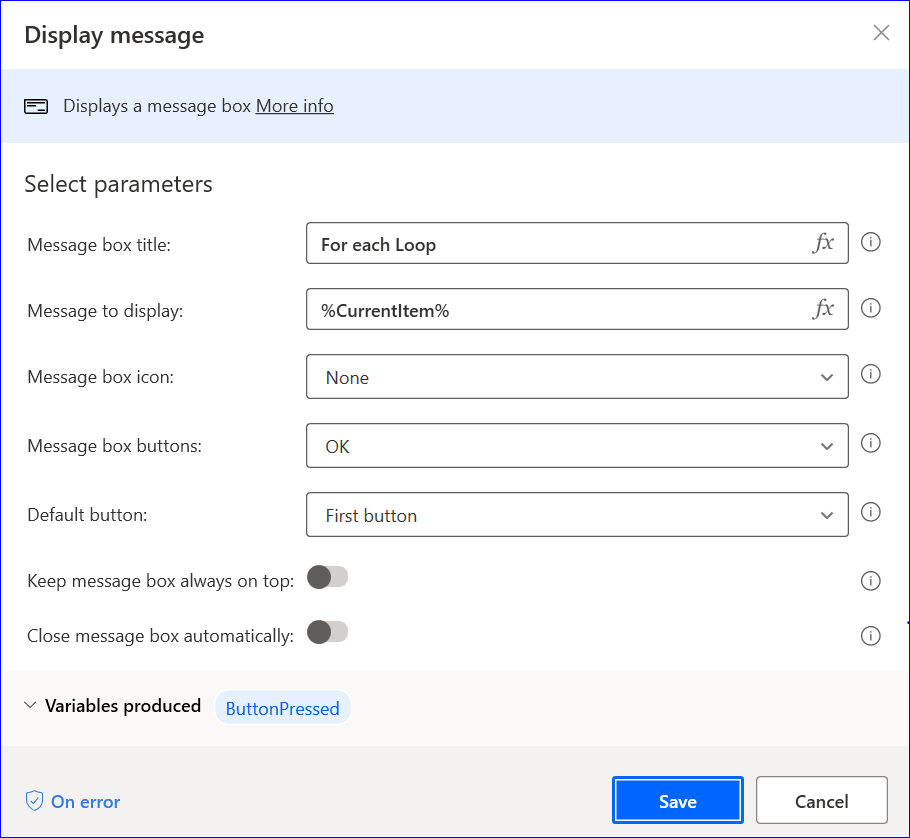
That’s it. Hit the run button to test your flow. As a part of the result, you will see Test1 and Test2 message boxes. Since we are iterating List which has two items, hence two items are displayed.
Hope this article will clarify your concept of Loops in PAD. If you like it, please share it and subscribe to our site for more topics. Very soon we will come with another part, which will describe the Exit loop, Loop condition, and Next loop.
Cheers !!