
How to create a repeating section in PowerApps?
Hello everyone !! Hope you all are doing well, I know it’s been a long time since I posted my last blog.
PowerApps continue to grow in popularity as a first choice for creating business apps in Office 365. Many organizations are moving/planning to move their existing InfoPath forms to PowerApps in SharePoint Online. Customers keep asking that is there any way through which we can migrate our hundreds of InfoPath forms to PowerApps with the least friction. At the time of writing, Microsoft is not providing any direct migration path to move existing InfoPath forms to PowerApps.
Today, we will discuss one of the common features, repeating section of InfoPath form and how you can create a similar control in PowerApps. The repeating section in InfoPath Library forms provides the ability to include multiple line items associated with individual library items. e.g. In this screenshot, Flight delay report detail can be stored in a list & customer details associated with flight delay can be stored in another list/library.
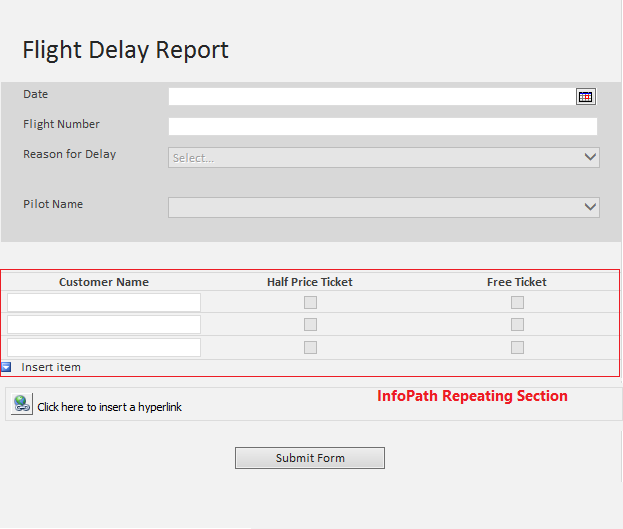 Figure 1
Let’s start creating a repeating section in PowerApps
We will use a repeating section to store expense detail associated with a project. We have 2 SharePoint Lists ExpenseMaster & ExpenseDetails to store data.
ExpenseMaster
 Figure 2
ExpenseDetails
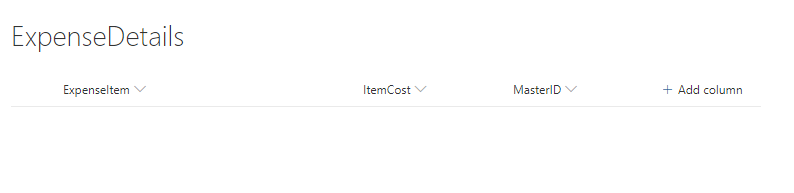 Figure 3
I have created a welcome screen with two buttons “Create New Expense” and “View & Modify Expense”.
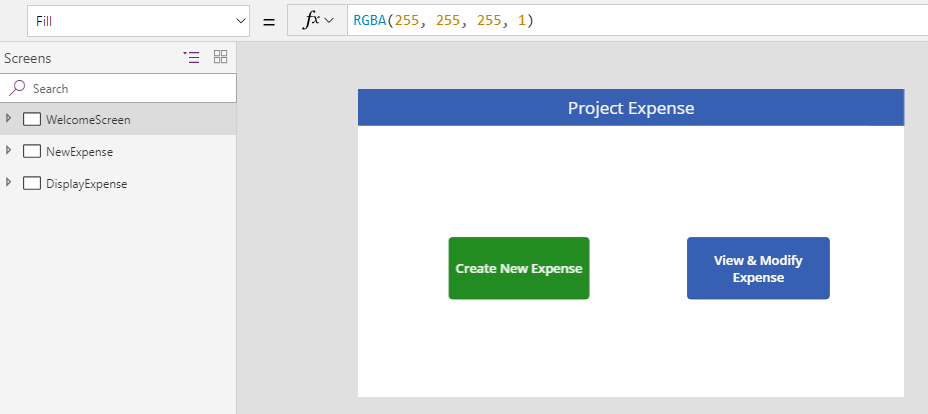 Figure 4
Create a new expense button that will redirect the user to the NewExpense screen & View & Modify Expense button will redirect the user to the DisplayExpense screen. We will use the collection to store expense details information on the New Expense screen.
Formula written on the OnSelect event of both buttons are:
Create New Expense->
/*Load a fresh new form of NewFormExpenseMaster */NewForm(NewFormExpenseMaster);
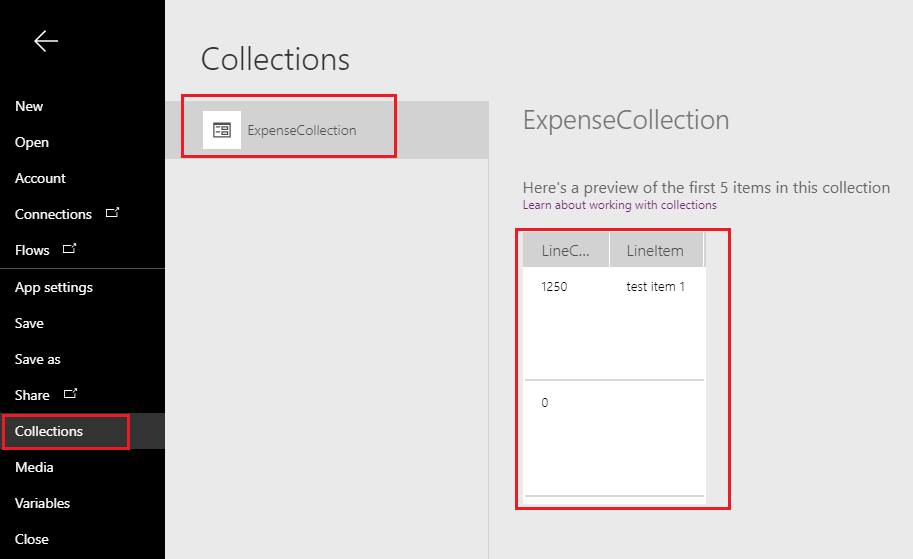
/*Clear ExpenseCollection & add a new LineItem with LineCost equal to zero*/ClearCollect(ExpenseCollection,{LineItem:"",LineCost:0});
/*Navigate to new screen*/Navigate(NewExpense,ScreenTransition.Cover)
View & Modify Expense -> Navigate('View Screen',ScreenTransition.Cover)
NewExpense Screen:
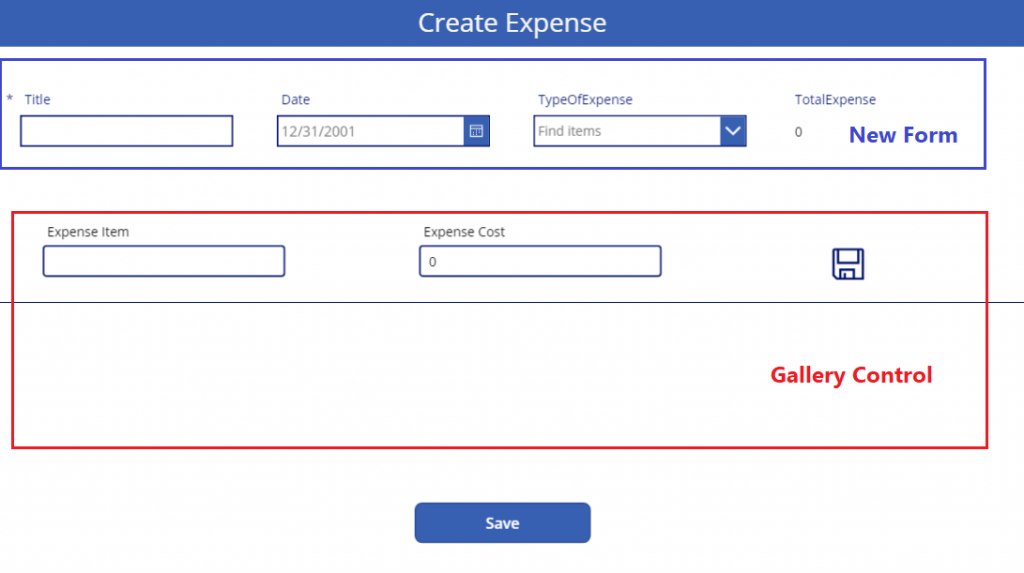 Figure 5
We are using a new form control to add data to the ExpenseMaster list & a vertical gallery control to provide a repeating section control functionality.
we have added 3 controls inside gallery control.
- ExpenseItem Textbox
- ExpenseCost Textbox
- save icon
When the user clicks on the save icon, the line item will get added to the “ExpenseCollection” collection.
OnSelect event for Save Icon and save button are given below.
Save Icon (OnSelect) -> Patch(ExpenseCollection, ThisItem,{LineItem:txtInputExpenseItem.Text, LineCost: Value(txtInputExpenseCost.Text)});Collect(ExpenseCollection,{LineItem: "",LineCost:0})
Save Button (OnSelect) -> SubmitForm(NewFormExpenseMaster)
After performing the above steps you can use “Save Icon” to create repeating sections as shown below.
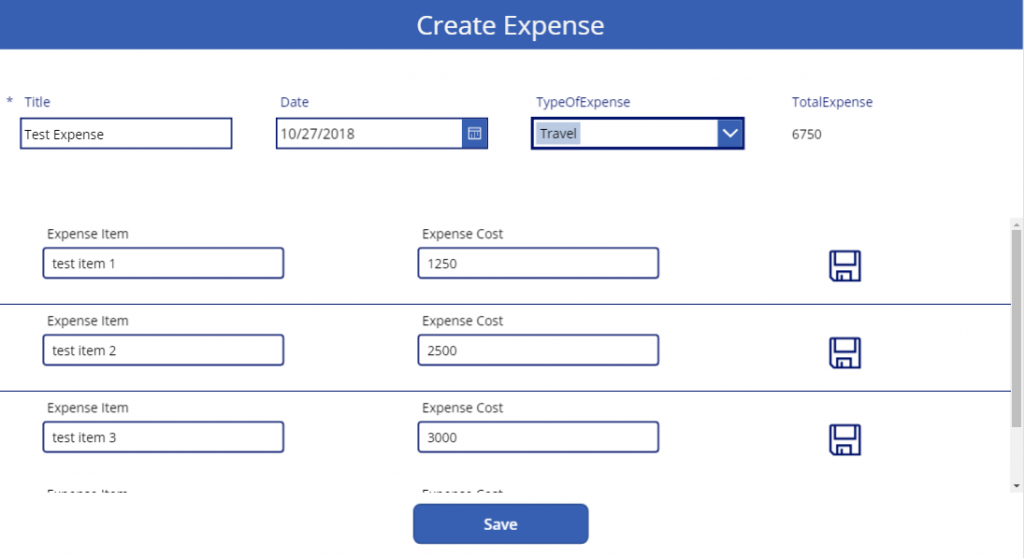
Figure 6
Once the user clicks on the save button, data will get stored in respective lists.

Working of Save Icon using OnSelect function
The patch function is used to modify or create data in a data source. Syntax for patch function is Patch( DataSource, BaseRecord, ChangeRecord1 [, ChangeRecord2, … ]).
You can treat “ExpenseColllection” as a data source and current item as a base record. Upon click of the save icon, we are collecting the data and showing it again into the form recursively. For a detailed explanation, you can visit the link.
In our next blog, we will see how to use collections with few examples. You can visit our earlier blog to see an example of a collect function.
Hope you like this blog, subscribe to our site for more stuff on powerapps, flow, azure, and other cloud technologies.
I appreciate the tutorial though I have one issue where when I save: SubmitForm(NewFormExpenseMaster), to use your example, it does not save to ExpenseDetails with the MasterID reference to ID of ExpenseMaster. If I add a patch to the SubmitForm I can get it to save the data fromt he collection but MasterID is still not referenced. Any Ideas?
Is it possible to have a multi screen (4-5 screens) setup like you show above but also have a repeating table on another screen and upon submission there would be two SP lists that update, one with the consolidated data, with a unique ID that links to the other SP list with the repeating table data, as shown above?
yes, it is possible. See the below picture.
formula on submit button.
ClearCollect(
CustPatchrecord,
Patch(
Customer_Table,
Defaults(Customer_Table),
{
CustomerName: CustName_TextInput.Text,
CustomerAddress: CustAdd_TextInput.Text,
CustomerEmail: CustEmail_TextInput.Text,
CustomerContact: Telephone_TextInput.Text,Title:CustName_TextInput.Text
}
)
);
ForAll(
Gallery7.AllItems,
Patch(
Room_Details_Table,
{
CustomerName: CustName_TextInput.Text,
CustomerRefID: Concatenate(
Text(
Value(First(CustPatchrecord).ID),
“[$-en-GB]”
),
“_”,
CustName_TextInput.Text
),
ROOM: ThisRecord.RoomName_TextInput_1.Text,
ROOMTYPE: ThisRecord.RoomType_Txt_1.Text,
ROOMWIDTH: ThisRecord.RoomWidth_Txt_1.Text,
ROOMDROP: ThisRecord.RoomDrop_Txt_1.Text,Title:Concatenate(
Text(
Value(First(CustPatchrecord).ID),
“[$-en-GB]”
),
“_”,
CustName_TextInput.Text
)
}
)
);Navigate(Completed,ScreenTransition.Fade)
You can put the customer details part to another screen in your case.
Let me know if you need any other information.
Hello Rakesh,
Happy to learn
Thank you so much for the clear cut explanation of Patch function and Clear Collection.
I have created a trial App to Learn. I am facing an Issue where the details in Expense details are not getting saved. I would like to know where i went Wrong.
Thanks
Bhagya
Hi Bhagyashri,
Can you provide your formula in which you are writing on the save button?
Thanks