Learn how to create custom business apps with Power Apps and how to automate business process with Power Automate.
Self-Paced

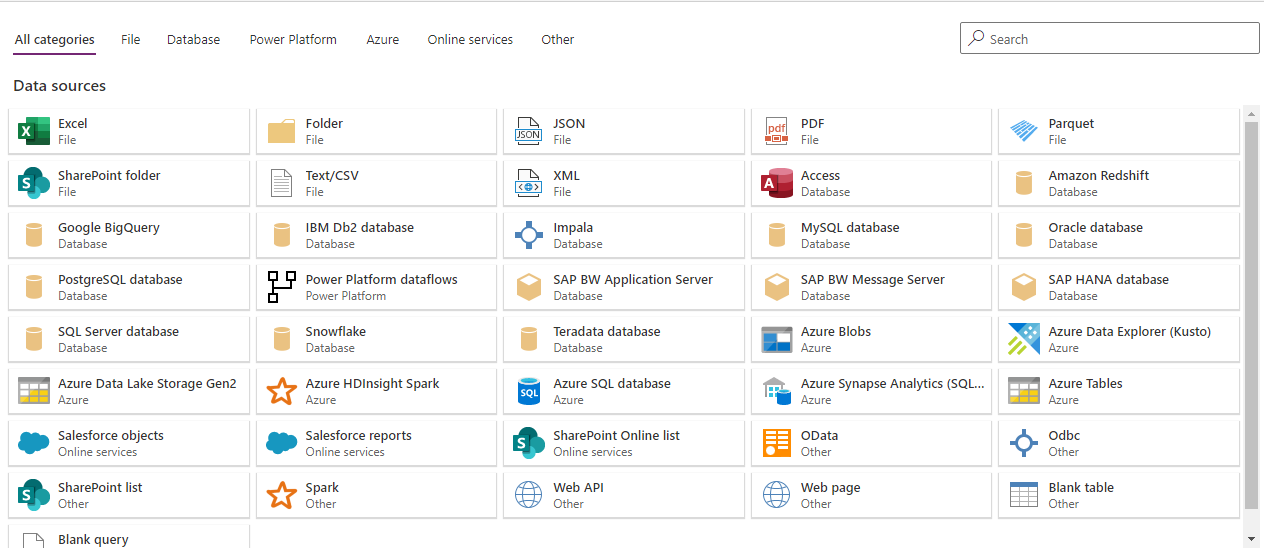
PowerApps allows you to create canvas app and model-driven app. Canvas apps start with your user experience, allowing you to create a highly customizable interface by using various UI controls such as labels, text-input boxes, drop-down lists, media, charts, and so on.
Canvas apps start with your user experience, crafting a highly customizable interface with the power of a blank canvas and ability to connect to 275+ data sources.
In this topic, you will learn what the main building blocks of canvas apps are. Before you create your first canvas app it is important for you to understand each component and how you can use them to create an enterprise-grade app.
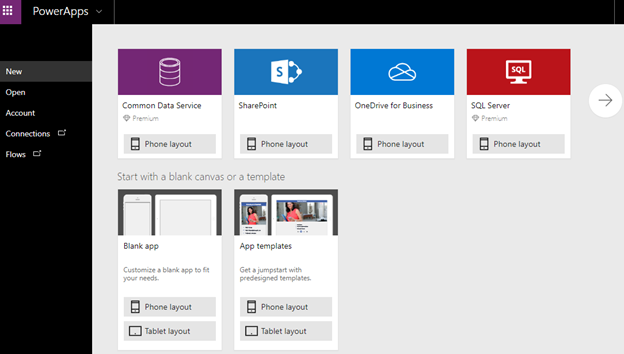
This image shows that you can create a canvas app starting from blank which lets you create a custom app to meet your needs or connect to an existing data source and get a ready-made canvas app:
In this section you will learn what the different types of screens and controls are that you can use to customize your PowerApps app.
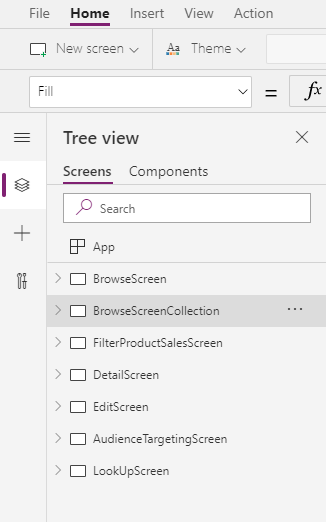
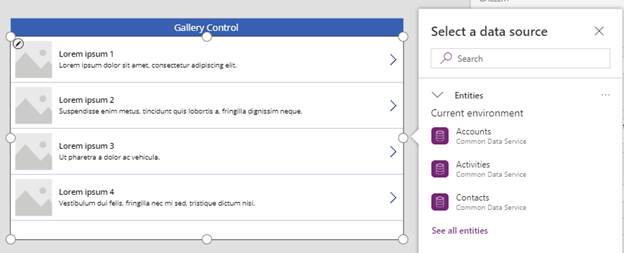
Screens in an application hold controls such as text, images, and other data. Canvas apps allow you to add multiple screens and add ways for users to navigate between them. Here is an example of multiple screens:
PowerApps provides different types of screens that you can readily use in your app, including the following:
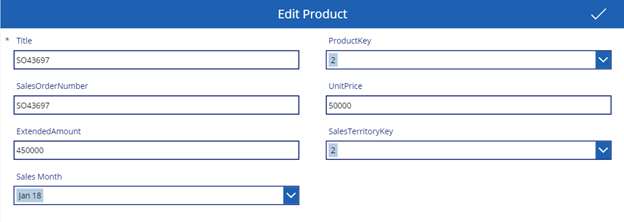
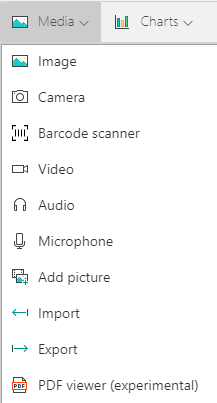
PowerApps provides a wide collection of user interface (UI) elements called controls which can be added to the canvas app to customize the look and provide appropriate functionalities to the users. You can customize the appearance and behavior of these controls from the toolbar, formula bar, or properties tab. Under the insert tab you can find all controls available in PowerApps.
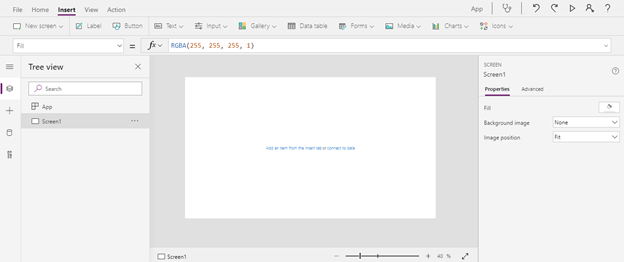
This image shows a blank screen (tablet) in a PowerApps web studio:
The types of controls that you can add to enhance your apps are as follows:
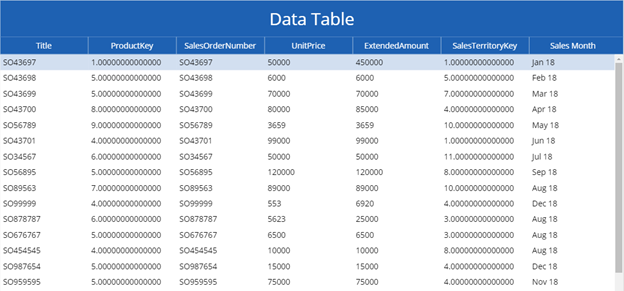
Data Table can display multiple records as shown in this image.
Formulas: Formulas enable you to improve functionality and change the behavior of your canvas app. You can configure canvas apps with formulas that can calculate values provided on the screen, perform different tasks, and respond to user input.
You can use formulas for a wide variety of scenarios. For example, you build a formula that determines how your app responds when a user selects a specific value from a drop-down list. These formulas might change the screen background color, update a data source, or return your location as a map coordinate by using the global positioning system (GPS).
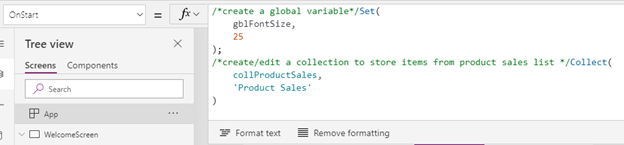
The below image shows an example of how to write a formula in PowerApps. In this example we are doing two tasks:
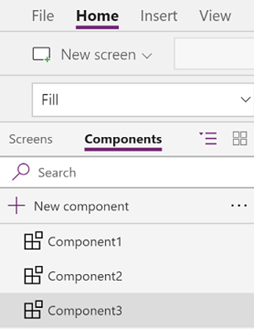
Components are reusable building blocks for canvas apps so that app makers can create custom controls and use them across apps. Components can be exported and imported in different apps across organizations.
Components are useful in building larger apps that have similar control patterns. For example, we can build a navigation control and use it across our app on different screens. Once we update a component, all instances in the app reflect your changes. Components improve performance and help in standardizing the look-and-feel of PowerApps apps in an organization.
A component has input properties that can receive values from the app, and the component can use these internally. Components also have output properties that can provide output values to the app. We will create a component in Chapter 2 and use it across our app.
This image shows a list of components defined in the app:
Developers can extend canvas apps, allowing them to build more powerful solutions for organizations and customers. These are the different ways in which developers can implement advanced capabilities in their app:
Build custom connectors – Developers can develop custom connectors to connect with services that are not available as prebuilt connectors. A custom connector is a wrapper around a REST API that allows PowerApps to communicate with the REST or SOAP API
Build Azure Functions – Developers can implement their custom server-side logic using Azure functions.
Build an app with offline capability – Developers can develop apps that users can use even when they are not connected to the internet. Collections can be used to store data locally on a device when the user is not connected.
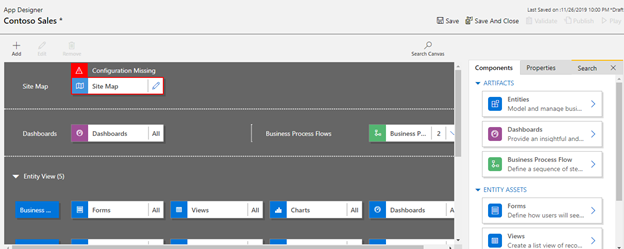
Model-driven app development starts with your data model and uses a component-based approach to developing a robust app. Model-driven apps are comprised of components such as entities, views, charts, forms, business processes, and dashboards which together form a great UI.
Model-driven app consists of three focus areas:
This image shows a sample model-driven app in the app designer:
When you develop a model-driven app, you can use standard entities, custom entities, or both. A canvas app can be embedded in a model-driven app. We will discuss in more detail about common data service (CDS) and model-driven apps in upcoming blogs.
In this blog Canvas App and Model-Driven App, you learned about building blocks of canvas-apps and model-driven apps.
For further query related to Canvas App and Model-Driven App comment below or contact us
Learn how to create custom business apps with Power Apps and how to automate business process with Power Automate.