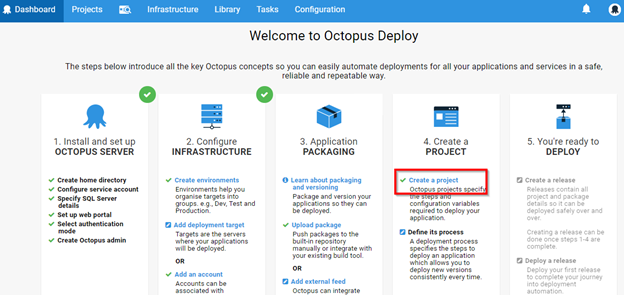
This self-paced course will help you prepare for the Azure Developer certification exam AZ-204: Developing Solutions for Microsoft Azure.
VILT & Self-Paced


In this blog Azure DevOps with Octopus Deploy you will learn how to use Octopus Deploy with Azure DevOps.
Octopus Deploy is a single place for your team to manage releases, automate deployments, and automate the runbooks that keep your software operating.
Octopus Deploy is an automated deployment server that makes it easy to automate the deployment of ASP.NET web applications, Java applications, NodeJS application and custom scripts to multiple environments.
Azure DevOps will be handling the build/CI automation part of the process and will work with Octopus Deploy to handle deployment orchestration. The Octopus setup contains a central deployment server, along with “Tentacle” agents that run on any target VMs where deployment will take place.
Octopus Deploy has two components:
We will spin up an Octopus server on Azure. Click the Deploy to Azure button below to provision an Octopus Server.
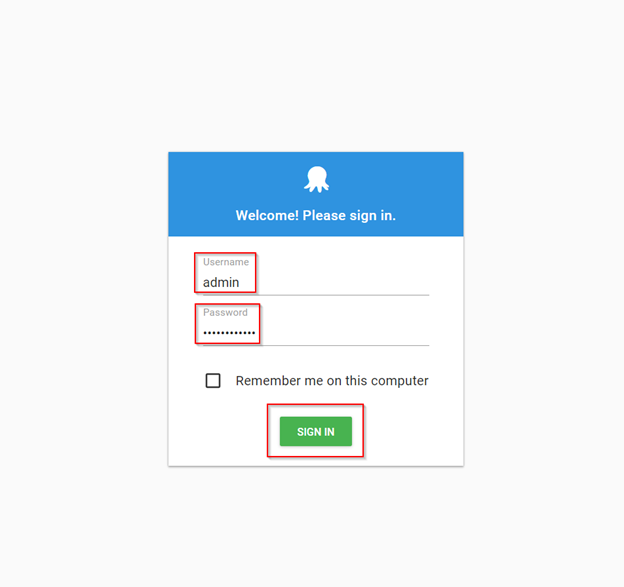
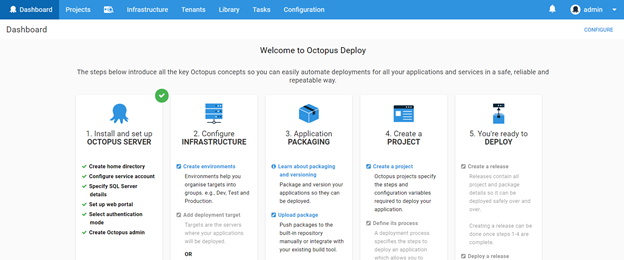
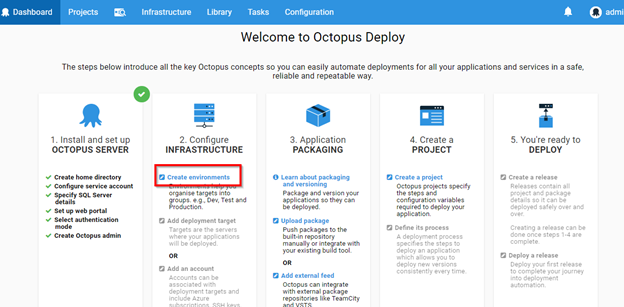
2. You will see the Octopus deploy web portal.
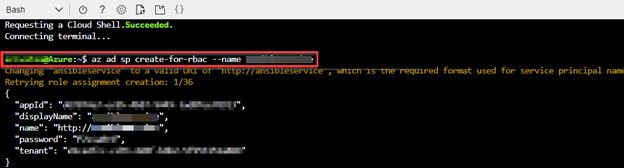
We need to generate SPN details to get Tenant ID, Application ID and Application Password/Key which will be used in the later part of the lab.
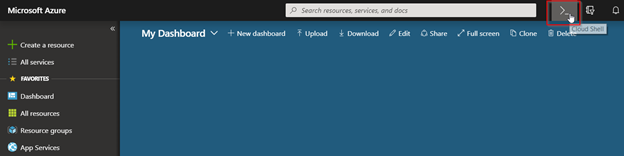
2. Select Bash or Powershell to run the command which will generate the SPN details.
3. Create a Storage account as Azure Cloud Shell requires an Azure file share to persist files, if you already have one select it or create new. Select the subscription and click on Create storage.
4. Once the storage account is provisioned, enter the following command by replacing ServicePrincipalName with your desired value.
az ad sp create-for-rbac -n ServicePrincipalName
5. It will give you a JSON output as shown in the image. Copy the output to notepad or text file. You will need them later.
Since, the deployment target is an Azure WebApp, we need to create one. Click the button below to provision an Azure WebApp.
An API key is used to authenticate Azure DevOps with Octopus server. Using API key lets you keep your username and password a secret.
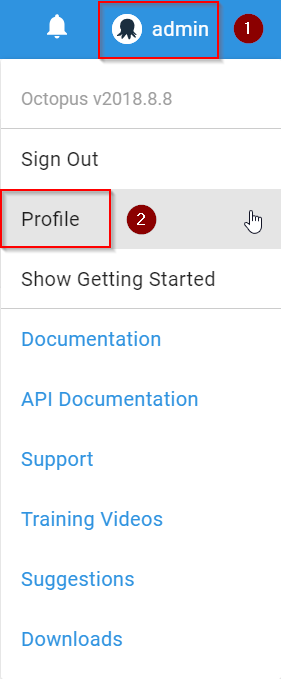
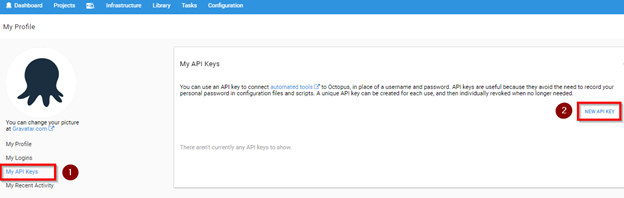
2. Select My API Key and click New API Key to create one. We will use the API Key to connect Octopus Deploy with Azure DevOps.
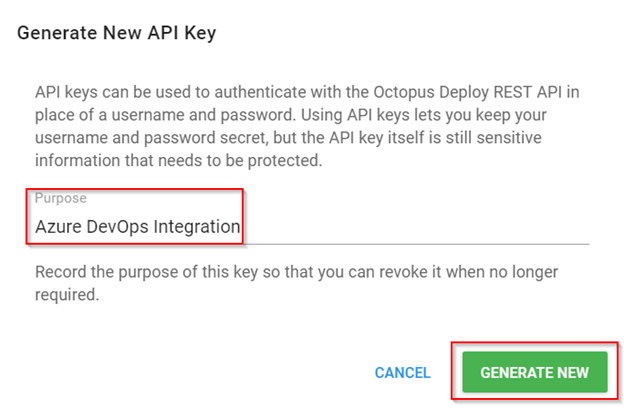
3. Specify a purpose, for instance, Azure DevOps Integration and click Generate New.
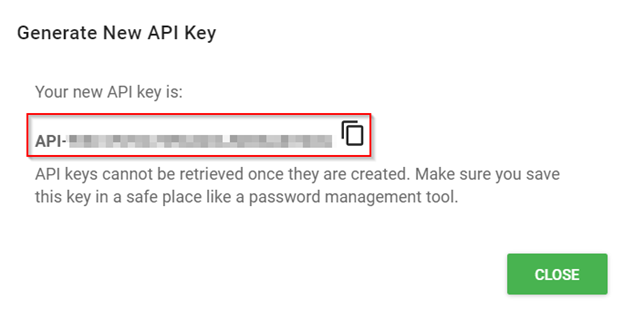
4. Copy the API Key to clipboard and save this to a notepad as you might use it for future requests.
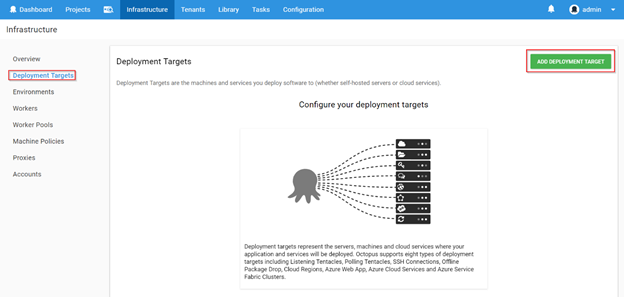
In this lab, we are using Azure App Service as the deployment target.
2. Once inside, click Add Environment.
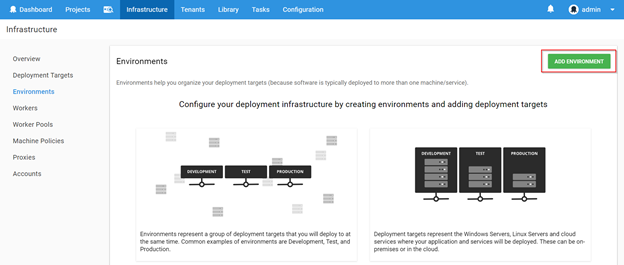
3. Provide the environment name and click Save.
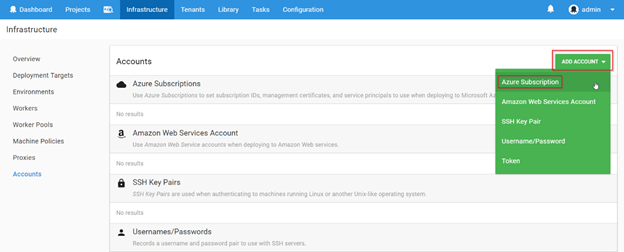
4. Octopus Deploy provides first-class support for deploying Azure Cloud Services and Azure Web Applications. To deploy software to Azure, we must add our Azure subscription to Octopus Deploy, and then use the built-in step templates to deploy to the cloud. Once the environment is created, click on Accounts select Azure Subscription from the ADD ACCOUNT dropdown.
Octopus Deploy authenticates with Azure with one of the two methods:
To deploy to Azure Resource Manager (ARM), Octopus requires Azure Service Principal Account.
To deploy to Cloud Services and Azure Web Apps, Octopus requires Azure Management Certificate.
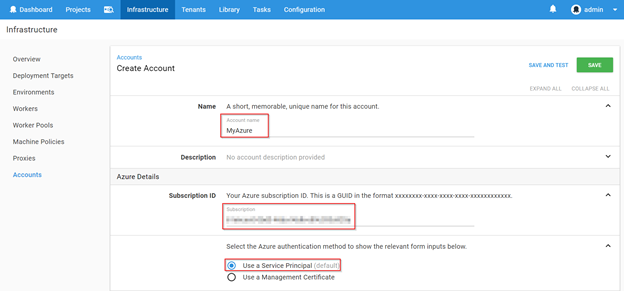
Name: Provide an account name
Subscription ID: Your Azure Subscription ID
Authentication Method: Choose Use a Service Principal
Tenant ID, Application ID, Application Password/Key: Created earlier in the lab
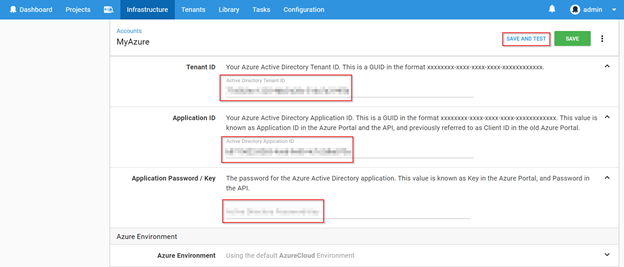
5. Click SAVE AND TEST and notice that your account is verified.
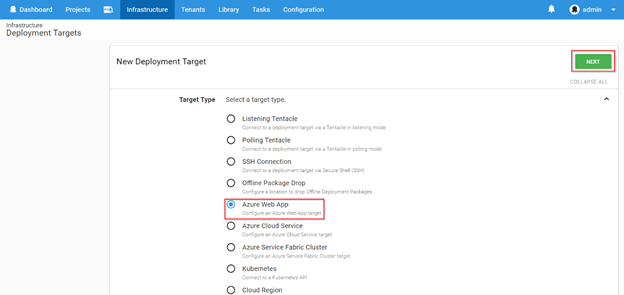
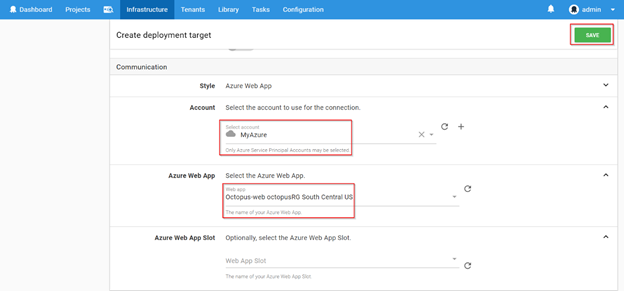
6. To add the deployment target, go to Deployment Targets, click on ADD DEPLOYMENT TARGET, select Azure Web App and click NEXT.
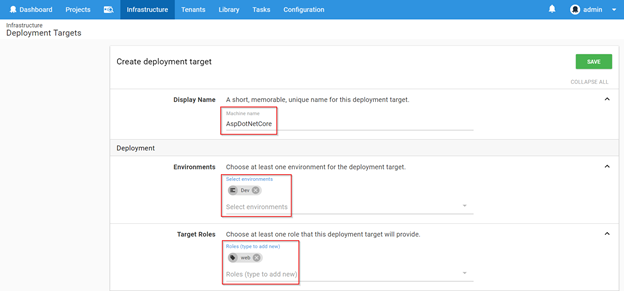
7. In the Create deployment target page, provide Display Name, choose Environment from the dropdown, add Target Roles(Tags), select the Account which was created earlier, and select Azure Web App from the dropdown as shown below and click Save.
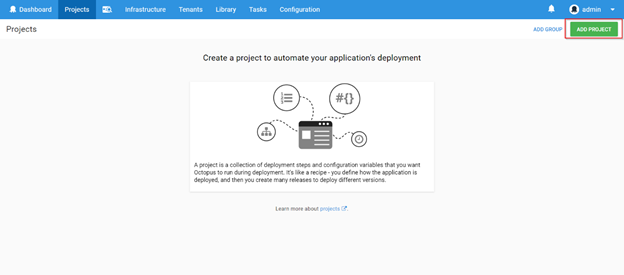
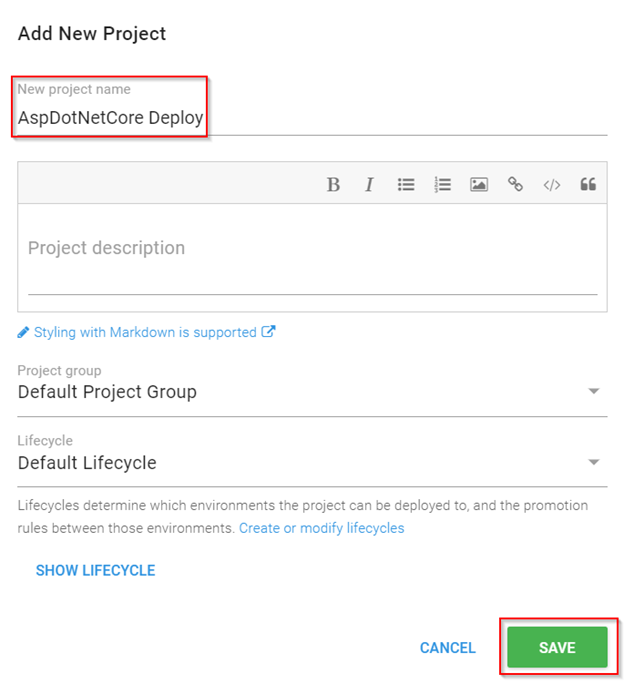
A Project is a collection of deployment steps and configuration variables that define how your software is deployed.
2. Click on ADD PROJECT, provide the project name, description and click on SAVE.
3. Once the project is created, click Define your deployment process. The deployment process is like a recipe for deploying your software.
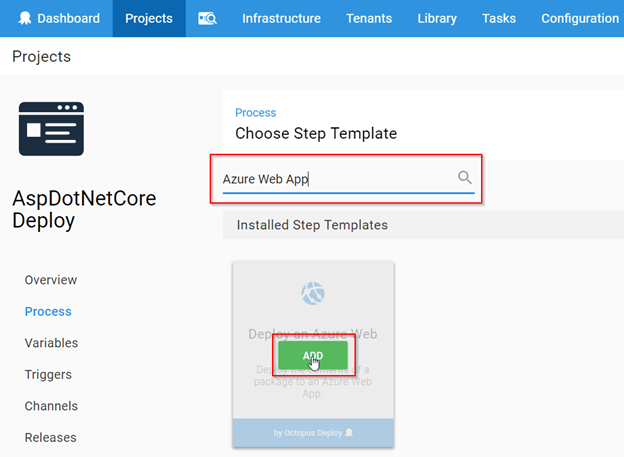
4. Click on ADD STEP to see a list of built-in step templates, custom step templates, and community contributed step templates.

5. Search for Azure Web App template and click Add.
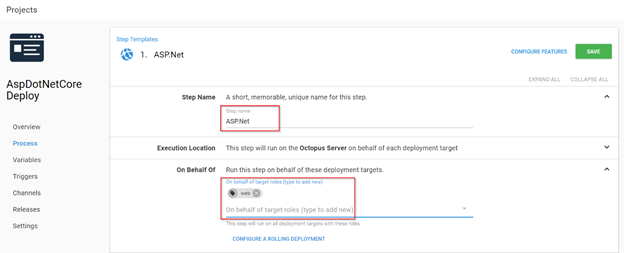
6. Populate the step template with required details –
Step Name : A short, unique name for the template.
On Behalf Of : Choose the target role from the drop down that was created in previous exercise step 8.
Package ID : Type-in as Asp.netcore (if you are providing different package ID, update it in Package Application task of the build definition)

7. Click Save to complete the project creation and its deployment process.
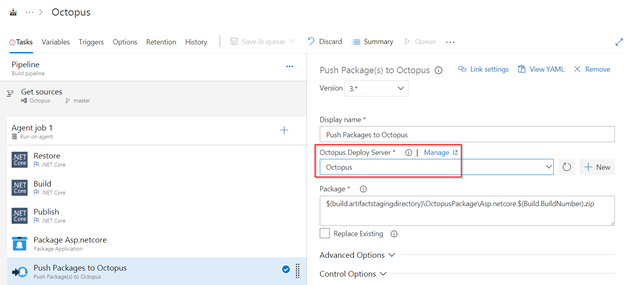
2. In Push Packages to Octopus task, update Octopus Deploy Server field with the created endpoint value.
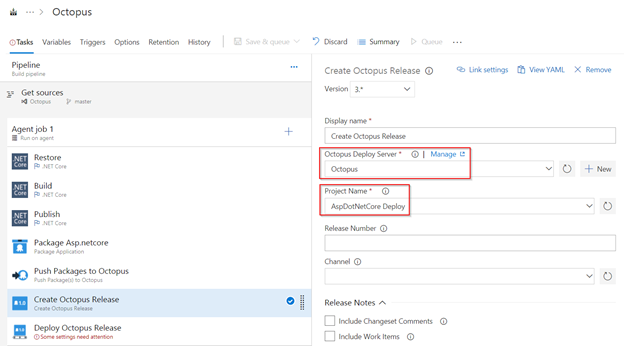
3. In the Create Octopus Release task, update the Octopus Deploy Server field with the created endpoint value, and choose the created Project from the dropdown.
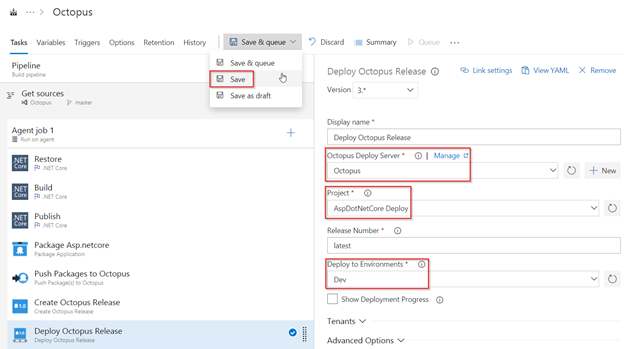
4. In Deploy Octopus Release task, update Octopus Deploy Server field with the created endpoint value, choose the appropriate values from the drop down for fields — Project and Deploy to Environments and Save & Queue the build definition.
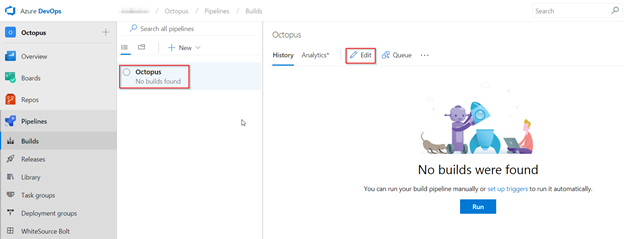
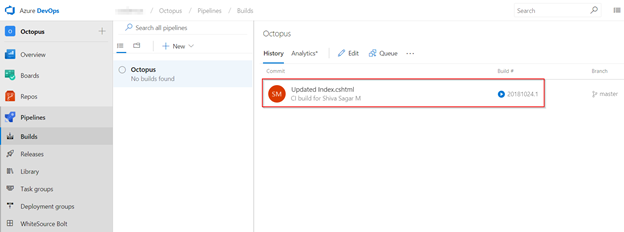
5. Navigate back to the Build tab see progress of the build.
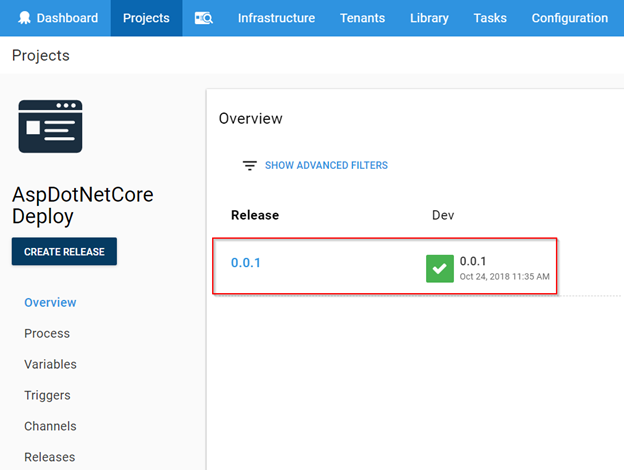
6. Once the build completes, go to Octopus portal project dashboard to see the release progress.
7. Go to the created Azure Web App from your Azure Portal and click Browse.
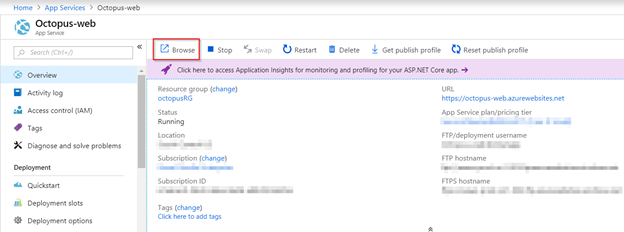
We will see the associated ASP.NET Core application up and running.

This self-paced course will help you prepare for the Azure Developer certification exam AZ-204: Developing Solutions for Microsoft Azure.
AZ-900: Microsoft Azure Fundamentals Tutorial provides foundational level knowledge on cloud concepts; core Azure services; security, privacy, compliance, and trust; and Azure pricing and support.
This self-paced course will help you prepare for the Azure DevOps certification exam AZ-400: Designing and Implementing Microsoft DevOps Solutions.
Informative post. Concept has been explained very well.Looking forward for such informative posts