Hello readers!! Hope you all are doing well. In this article, we will see how to create a Notification Tool Using PowerApps. Most of the time our support team needs a handy notification tool. This tool is helpful in end-user communication. Service uses for outage or maintenance regarding communication.
Main Screen
Here I am using simple canvas app screen to build this tool. Below is the picture of main screen.
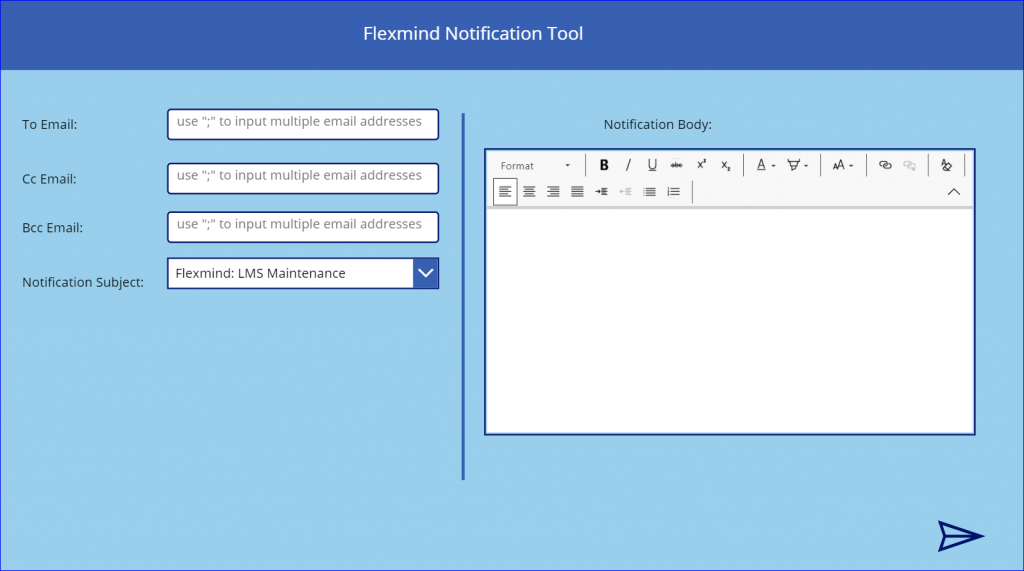
My Notification tool is very simple. It consists of Labels, Text boxes, Dropdown, Rich text boxes, and send icons. Later we will discuss in detail each control. Before that, we will see the Data sources.
Data Sources in Notification tool
In this application, we are using two data sources.
1. Mail: To send an email
2. SharePoint List: To store Subject and respective Body template
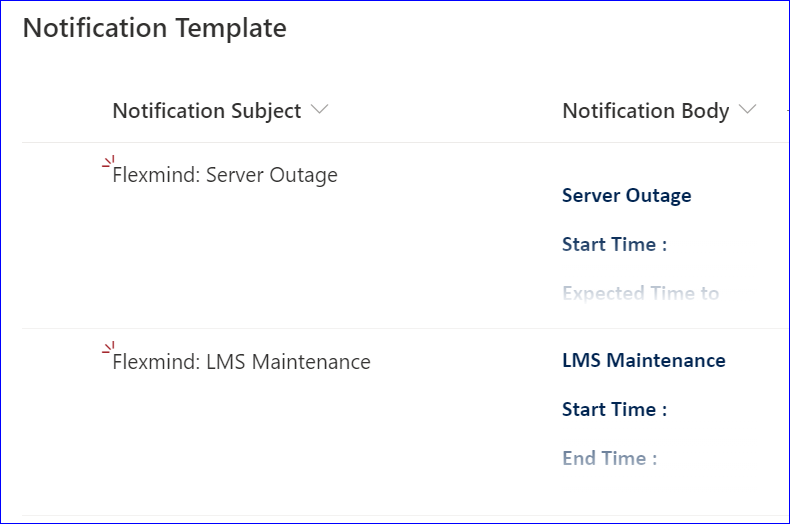
SharePoint List Structure
Our SharePoint list will have two columns.
1. Notification Subject (Single line of text)
2. Notification Body (Multi lines of text with enhanced rich text)
Functions and Formulas for Notification Tool
Below are formulas for send icons and other controls.
Dropdown items = Subject Column of SharePoint List
Default of RichTextEditor is equal to
LookUp('Notification Template',Dropdown1.SelectedText.Value=Title,'Notification Body')
Above formula will set the body on the basis of subject selection. Refer this link to see more on Filter, Search, and LookUp functions
OnSelect of send icon is equal to
Mail.SendEmailV3(TextInput1.Text,Dropdown1.SelectedText.Value,RichTextEditor1.HtmlText,true,{cc:TextInput1_1.Text,bcc:TextInput1_2.Text})
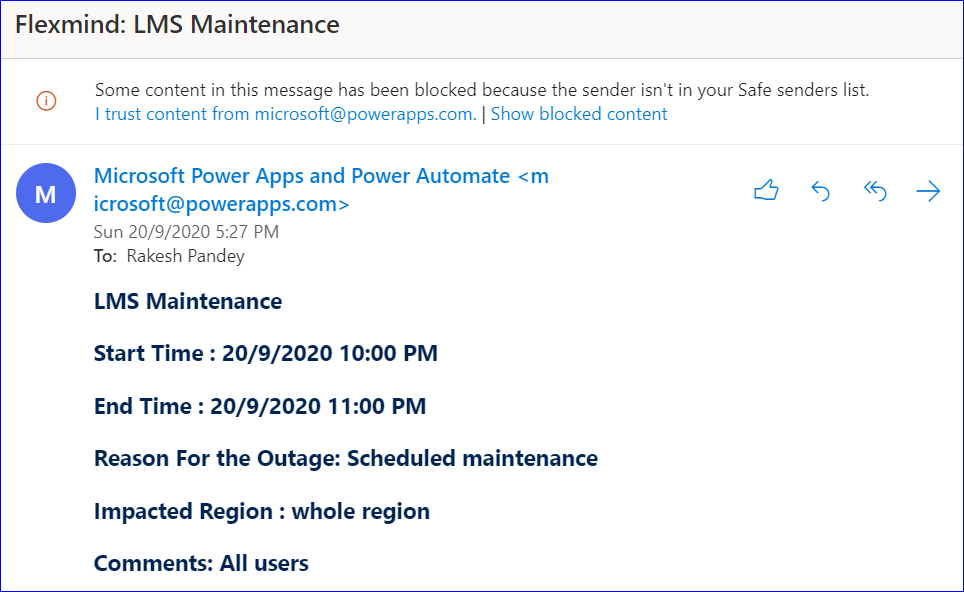
After performing above steps you can successfully test the tool. Refer below picture for test email.
Hope you will like this article on how to create Notification Tool Using PowerApps, if so please share and subscribe our site. You can also buy our self-paced by clicking on the link.